
Bobcat E88 Excavator B62N11001 & Up 46927512 (12-25) (Preview)
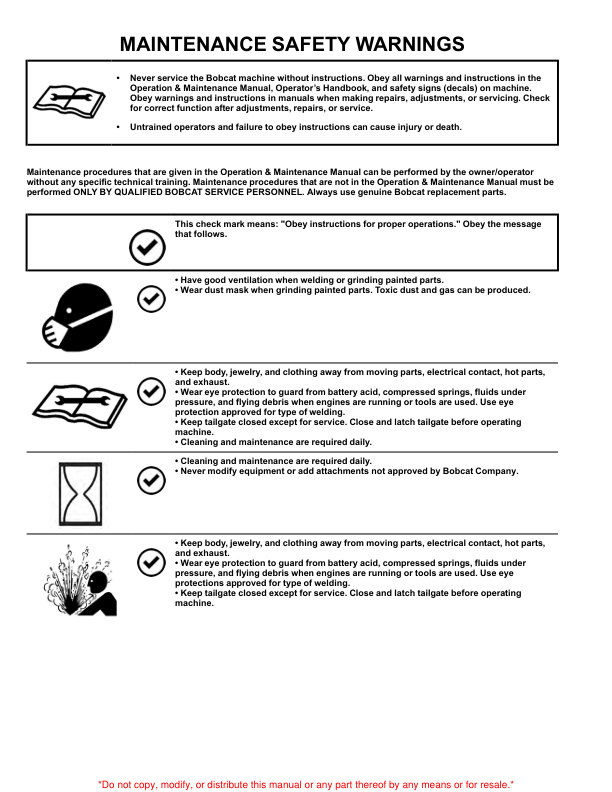
MAINTENANCE SAFETY WARNINGS
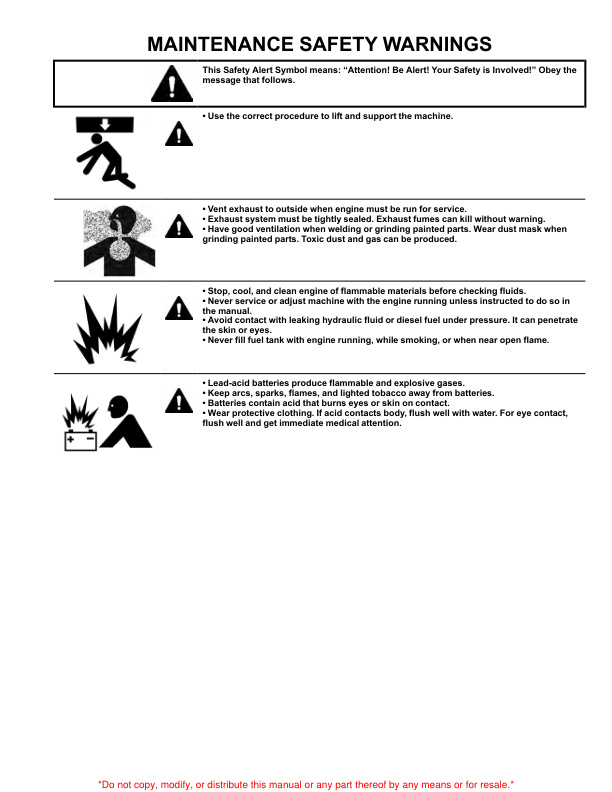
MAINTENANCE SAFETY WARNINGS
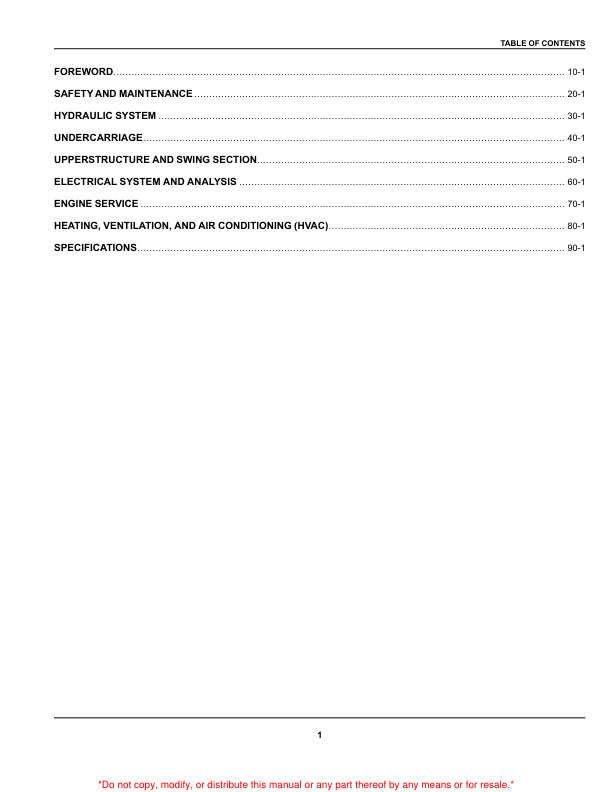
CONTENTS
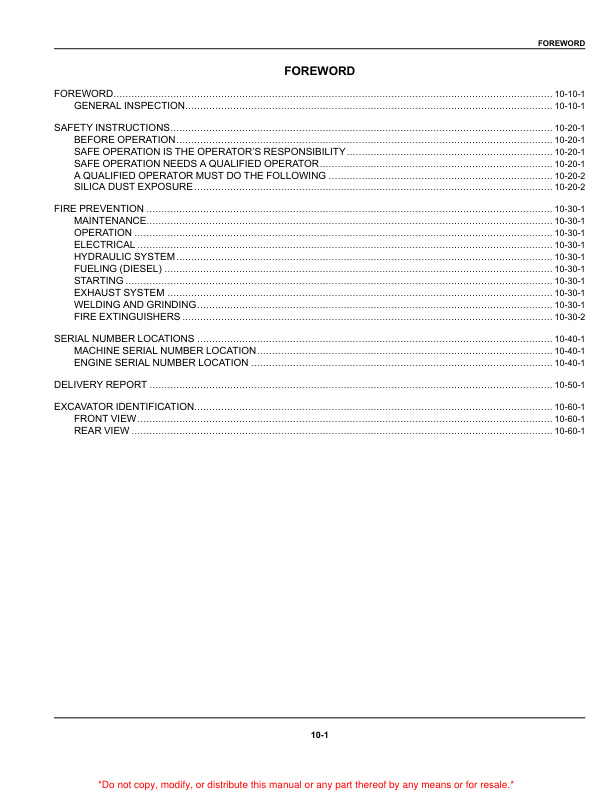
FOREWORD
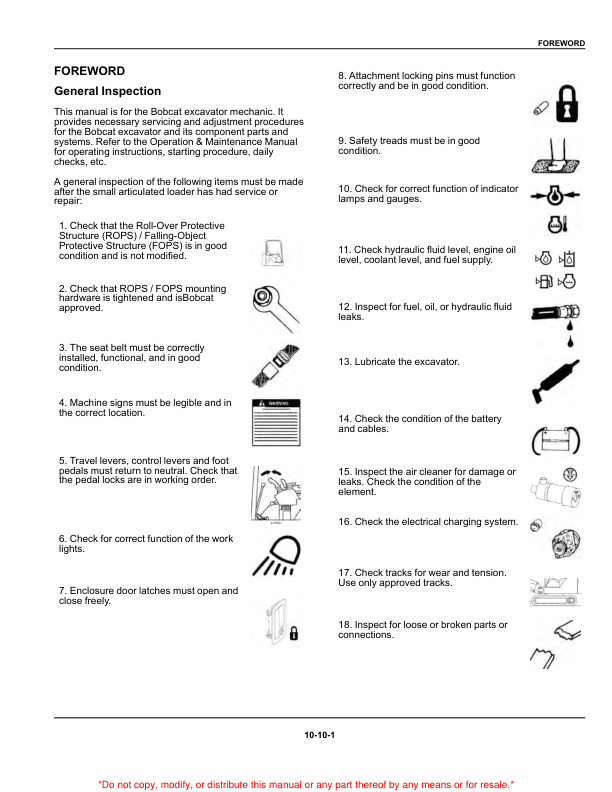
– FOREWORD
— General Inspection
– SAFETY INSTRUCTIONS
— Before Operation
— Safe Operation Is The Operator’s Responsibility
— Safe Operation Needs A Qualified Operator
— A Qualified Operator Must Do The Following
— Silica Dust Exposure
– FIRE PREVENTION
— Maintenance
— Operation
— Electrical
— Hydraulic System
— Fueling (Diesel)
— Starting
— Exhaust System
— Welding And Grinding
— Fire Extinguishers
– SERIAL NUMBER LOCATIONS
— Machine Serial Number Location
— Engine Serial Number Location
– DELIVERY REPORT
– EXCAVATOR IDENTIFICATION
— Front View
— Rear View
SAFETY AND MAINTENANCE
– LIFTING AND BLOCKING THE MACHINE
— Lifting And Blocking The Machine
– LIFTING THE MACHINE
— Lifting The Machine
– OPERATOR CAB (ROPS / TOPS / FOPS)
— Operating The Cab Door
— Operating The Front Window
— Operating The Right Windows
— Operating The Cab Interior Light
— Operating Windshield Wiper
— Window Washer Reservoir
— Heating, Ventilation, And Air Conditioning Ducting
– TRANSPORTING THE MACHINE
— Fastening The Machine To A Trailer
– TAILGATE
— Opening And Closing The Tailgate
– RIGHT SIDE COVER
— Opening And Closing The Right Side Cover
– SERVICE SCHEDULE
— Maintenance Intervals
— Service Schedule
— Inspection Checkbook
– ENGINE AIR CLEANER
— Replacing The Outer Filter Of The Air Cleaner
— Replacing The Inner Filter Of The Air Cleaner
– CAB FILTERS
— Cleaning And Maintaining The Recirculation Filter
— Cleaning And Maintaining The Fresh Air Filter
– ENGINE COOLING SYSTEM
— Cleaning The Engine Cooling System
— Coolant Types
— Coolant Concentration
— Propylene Glycol (PG) Concentration
— Ethylene Glycol (EG) Concentration
— Checking Coolant Level
— Replacing Coolant
– FUEL SYSTEM
— Fuel Specifications
— U.S. Standard (ASTM D975)
— E.U. Standard (EN590)
— Biodiesel Blend Fuel
— Filling The Fuel Tank
— Using The Fuel Fill Pump
— Removing Water From The Fuel Filter
— Replacing The Fuel Filter
— Replacing The Fuel Pre-Filter
— Replacing The Fuel Tank Vent Filter
– ENGINE LUBRICATION SYSTEM
— Checking And Adding Engine Oil
— Engine Oil Chart
— Replacing Engine Oil And Filter
– HYDRAULIC SYSTEM
— Checking And Adding Hydraulic Fluid
— Hydraulic Fluid Chart
— Hydraulic Fluid Colors
— Replacing The Hydraulic Filter
— Replacing The Case Drain Filter
— Replacing Hydraulic Fluid
— Checking The Fluid Level Of The Swing Motor Gear Box
— Replacing Swing Motor Gear Box Fluid
– MACHINE LUBRICATION
— Grease Fitting Locations
— Lubricate As Indicated
— Blade Cylinder
— Boom Base
— Bucket, Arm, and Boom
— Articulated Boom (If Equipped)
— Remote Lubrication
– PIVOT PINS
— Pivot Pin Inspection And Maintenance
– TRAVEL MOTOR
— Checking And Adding Travel Motor Fluid
— Replacing Travel Motor Fluid
– EMERGENCY EXITS
— Emergency Exit Locations
— Making An Emergency Exit Through The Front Window
— Making An Emergency Exit Through The Right Side Window
– SEAT BELT
— Inspecting And Maintaining The Seat Belt
– CONTROL CONSOLE LOCKOUTS
— Inspecting And Maintaining The Control Console Lockouts
– TOWING THE MACHINE
— Towing The Machine
– REMOTE START TOOL (SERVICE TOOL) KIT – 7217666
— Remote Start Tool (Service Tool) Kit — 7217666 Description
— Remote Start Tool (Service Tool) – 7022042
— Excavator Service Tool Harness – 6689747
— Computer Service Tool Harness – 6689746
HYDRAULIC SYSTEM
– HYDRAULIC / HYDROSTATIC SCHEMATICS
— S/N B62N11001 & Above
– HYDRAULIC SYSTEM INFORMATION
— Glossary Of Hydraulic / Hydrostatic Symbols
— Glossary Of Hydraulic / Hydrostatic Symbols
— Troubleshooting The Hydraulic Circuit
— Troubleshooting The Cylinder Circuit
— Troubleshooting The Slew (Upperstructure Slew) Circuit
— Troubleshooting The Travel Circuit
– CYLINDER (BOOM)
— Testing The Boom Cylinder
— Removing And Installing the Boom Cylinder
— Boom Cylinder Parts Identification
— Disassembling The Boom Cylinder
— Assembling The Boom Cylinder
– CYLINDER BOOM (WITH ARTICULATED BOOM)
— Testing The Boom (With Articulated Boom) Cylinder
— Removing And Installing The Boom (With Articulated Boom) Cylinder
— Boom Cylinder Parts Identification
— Disassembling The Boom Cylinder
— Assembling The Boom Cylinder
– CYLINDER (ARM)
— Testing The Arm Cylinder
— Removing And Installing The Arm Cylinder
— Arm Cylinder Parts Identification
— Disassembling The Arm Cylinder
— Assembling The Arm Cylinder
– CYLINDER ARM (WITH ARTICULATED BOOM)
— Testing The Arm (With Articulated Boom) Cylinder
— Removing And Installing The Arm (With Articulated Boom) Cylinder
— Arm Cylinder Parts Identification
— Disassembling The Arm Cylinder
— Assembling The Arm Cylinder
– CYLINDER (BOOM SWING)
— Testing The Boom Swing Cylinder
— Removing And Installing The Boom Swing Cylinder
— Boom Swing Cylinder Parts Identification
— Disassembling The Boom Swing Cylinder
— Assembling The Boom Swing Cylinder
– CYLINDER (BUCKET)
— Testing The Bucket Cylinder
— Removing And Installing The Bucket Cylinder
— Bucket Cylinder Parts Identification
— Disassembling The Bucket Cylinder
— Assembling The Bucket Cylinder
– CYLINDER (BLADE)
— Removing The Blade Cylinder Cover (Version Three)
— Testing The Blade Cylinder
— Removing And Installing The Blade Cylinder
— Blade Cylinder Parts Identification
— Disassembling The Blade Cylinder
— Assembling The Blade Cylinder
– CYLINDER (CLAMP)
— Testing The Clamp Cylinder
— Removing And Installing The Clamp Cylinder
— Clamp Cylinder Parts Identification
— Disassembling The Clamp Cylinder
— Assembling The Clamp Cylinder
– CYLINDER (ARTICULATED BOOM)
— Testing The Articulated Boom Cylinder
— Removing And Installing The Articulated Boom Cylinder
— Articulated Boom Cylinder Parts Identification
— Disassembling The Articulated Boom Cylinder
— Assembling The Articulated Boom Cylinder
– VALVE (MAIN RELIEF)
— Description Of The Main Relief Valve
– VALVE (PORT RELIEF)
— Testing And Adjusting The Port Relief Valve Pressure
– VALVE (CROSS PORT RELIEF)
— Testing And Adjusting The Cross Port Relief Valve Pressure
— System Press At Gauge Port Specifications
— Removing and Installing The Cross Port Relief Valve
– VALVES (PRESSURE REDUCING)
— Testing And Adjusting The Pressure Reducing Valve
– HYDRAULIC CONTROL VALVE
— Description Of The Hydraulic Control Valve
— Removing And Installing The Hydraulic Control Valve
— Hydraulic Control Valve Parts Identification
— Disassembling And Assembling The Hydraulic Control Valve
— Disassembling And Assembling The Inlet Valve Section
— Disassembling And Assembling The Valve Section
– HYDRAULIC PUMP
— Hydraulic Pump Worksheet
— Pump Testing
— Hydraulic Pump Test Fitting Installation
— Adjusting The Minimum Displacement
— Adjusting The Torque Limiter Supply Pressure
— Adjusting The Pump Margin Pressure
— Adjusting The Load Sense Relief Valve
— Adjusting The Torque Limiter
— Removing And Installing The Hydraulic Pump
— Removing And Installing The Coupler
— Hydraulic Pump Startup
— Removing And Installing The Torque Limiter Valve
— Torque Limiter Valve Parts Identification
— Disassembling The Torque Limiter Valve
— Assembling The Torque Limiter Valve
— Initial Setting Of The Torque Limiter Valve
— Removing And Installing The Pump Control
— Pump Control Parts Identification
— Disassembling And Assembling The Pump Margin Control
— Disassembling And Assembling The Torque Limiter Supply Control
— Hydraulic Pump Parts Identification
— Disassembling The Hydraulic Pump
— Assembling The Hydraulic Pump
– MANIFOLD ASSEMBLY / ACCUMULATOR (WITH FIXED BOOM)
— Description Of The Manifold / Accumulator (With Fixed Boom)
— Removing And Installing The Manifold / Accumulator
— Manifold Assembly / Accumulator (With Fixed Boom) Parts Identification
— Disassembling And Assembling The Manifold Assembly / Accumulator
– MANIFOLD ASSEMBLY / ACCUMULATOR (WITH ARTICULATED BOOM)
— Description Of The Manifold / Accumulator (With Articulated Boom)
— Removing And Installing The Manifold / Accumulator
— Manifold Assembly / Accumulator (With Articulated Boom) Parts Identification
— Disassembling And Assembling The Manifold Assembly / Accumulator (With Articulated Boom)
– TRAVEL MOTOR
— Travel Motor Description
— Removing And Installing The Travel Motor
— Hydraulic Motor Parts Identification
— Gear Reduction Hub Parts Identification
— Disassembling The Travel Motor
— Assembling The Travel Motor
– SWIVEL JOINT (STANDARD BLADE)
— Removing And Installing The Swivel Joint
— Swivel Joint Parts Identification
— Disassembling And Assembling The Swivel Joint
– SLEW MOTOR
— Removing And Installing The Slew Motor
— Slew Motor Parts Identification
— Disassembling And Assembling The Slew Motor
– SLEW MOTOR (DRIVE CARRIER)
— Removing And Installing The Slew Motor (Drive Carrier)
— Slew Motor (Drive Carrier) Parts Identification
— Disassembling And Assembling The Slew Motor (Drive Carrier)
– JOYSTICK PATTERN SELECTOR VALVE
— Removing And Installing The Joystick Pattern Selector Valve
— Joystick Pattern Selector Valve Parts Identification
— Disassembling And Assembling The Joystick Pattern Selector Valve
– RIGHT CONTROL LEVER (JOYSTICK)
— Testing The Control Lever (Joystick)
— Removing And Installing The Right Control Lever (Joystick) Handle
— Removing And Installing The Joystick Assembly
— Right Control Lever (Joystick) Parts Identification
— Disassembling The Right Control Lever (Joystick)
— Assembling The Right Control Lever (Joystick)
– LEFT CONTROL LEVER (JOYSTICK)
— Testing The Control Lever (Joystick)
— Removing And Installing The Left Control Lever (Joystick) Handle
— Removing And Installing The Left Control Lever (Joystick) Assembly
— Left Control Lever (Joystick) Parts Identification
— Disassembling The Left Control Lever (Joystick)
— Assembling The Left Control Lever (Joystick)
– HYDRAULIC FILTER MOUNT
— Removing And Installing The Hydraulic Filter Mount
– HYDRAULIC RESERVOIR
— Removing And Installing The Hydraulic Reservoir
– OIL COOLER
— Oil Cooler Description
— Removing And Installing The Oil Cooler
– BLADE CONTROL LEVER
— Removing And Installing The Blade Control Lever Handle
— Removing And Installing The Blade Control Lever
— Blade Control Lever Parts Identification (Standard Blade)
— Blade Control Lever Parts Identification (4th Auxiliary)
— Disassembling And Assembling The Blade Control Lever
– CASE DRAIN FILTER MOUNT
— Removing And Installing The Case Drain Filter Mount
– TRAVEL CONTROL VALVE
— Removing And Installing The Travel Control Valve
— Travel Control Valve Parts Identification
— Disassembling And Assembling The Travel Control Valve
– VALVE (ARTICULATED BOOM)
— Removing And Installing The Articulated Boom Valve
— Articulated Boom Valve Parts Identification
— Disassembling And Assembling The Articulated Boom Valve
– REMOVING AIR FROM HYDRAULIC SYSTEM
— Removing Air From The Hydraulic System
– MANIFOLD (PIN GRABBER)
— Removing And Installing The Manifold (Pin Grabber)
— Manifold (Pin Grabber) Parts Identification
— Disassembling And Assembling The Manifold (Pin Grabber)
– SECONDARY AUXILIARY VALVE
— Removing And Installing The Secondary Auxiliary Valve
— Secondary Auxiliary Valve Parts Identification
— Disassembling And Assembling The Secondary Auxiliary Valve
– VALVE (BOOM LOCK)
— Removing And Installing The Boom Lock Valve
– VALVE (ARM LOCK)
— Removing And Installing The Arm Lock Valve
– VALVE (ARTICULATED BOOM LOCK)
— Removing And Installing The Articulated Boom Lock Valve
– VALVE (CLAMP DIVERTER)
— Removing And Installing The Clamp Diverter Valve
UNDERCARRIAGE
– BLADE
— Removing And Installing The Blade
– TRACK UNDERCARRIAGE (RUBBER TRACK)
— Description
— Track Lug Height
— Checking And Adjusting Track Tension (Rubber Track)
— Removing And Installing The Track (Rubber Track)
– TRACK UNDERCARRIAGE (STEEL / SEGMENTED TRACK)
— Description
— Checking And Adjusting Track Tension (Steel / Segmented Track)
— Removing The Steel / Segmented Track
— Installing The Steel / Segmented Track
— Removing And Installing The Steel / Segmented Guide Plate
– TRACK UNDERCARRIAGE COMPONENTS
— Removing And Installing The Idler
— Removing And Installing The Track Tensioner
— Track Tensioner Parts Identification
— Disassembling And Assembling The Track Tensioner
— Removing And Installing The Rollers
— Removing And Installing The Sprocket
— Removing And Installing The Rubber Pad
— Removing And Installing The Steel Shoe
– TRACK MAINTENANCE
— Track Damage Identification
— Cutting Of Steel Cords
— Abrasion Of Embedded Metals
— Separation Of Embedded Metals
— Separation Of Embedded Metals Due To Corrosion
— Cuts On The Lug Side Rubber
— Cracks On The Lug Side Rubber Due To Fatigue
— Lug Abrasion
— Cracks And Cuts On The Lug Side Rubber
— Abrasion Of The Track Roller Side
— Cuts On The Edges Of Track Roller Side
– SLEW CIRCLE GEAR
— Removing The Slew Bearing
— Installing The Slew Bearing
UPPERSTRUCTURE AND SWING SECTION
– UPPERSTRUCTURE
— Removing The Upperstructure
— Installing The Upperstructure
– CAB
— ROPS / Canopy Lifting Tool Dimensions
— Removing And Installing The Cab
— Removing And Installing The Door
— Removing And Installing The Door Latch
— Removing And Installing The Hold Open Latch
— Removing And installing The Front Window
— Disassembling And Assembling The Front Window
— Removing And Installing the Right Side Sliding Window
— Removing The Glass
— Installing The Glass
– SEAT
— Removing And Installing The Seat
– RIGHT CONSOLE
— Removing And Installing The Right Console Cover
– LEFT CONSOLE
— Removing And Installing The Lower Console Cover
— Removing And Installing The Upper Left Console Cover
— Removing And Installing The Compression Spring
— Removing And Installing The Left Console Lock Lever
— Removing And Installing The Left Console
– LEFT SIDE PANEL
— Removing And Installing The Left Side Panel
– RIGHT SIDE PANEL
— Removing And Installing The Right Side Panel
– COUNTERWEIGHT
— Removing And Installing The Counterweight
— Removing And Installing The Add-on Counterweight
– TRAVEL LEVER AND PEDALS
— Removing And Installing The Travel Levers And Pedals
— Removing And Installing The Articulated Boom Pedal
— Disassembling And Assembling The Travel Levers And Pedals
– FLOORPLATE
— Removing And Installing The Floorplate
– FUEL TANK
— Removing And Installing The Fuel Tank
– HORN
— Removing And Installing The Horn
– SWING FRAME
— Removing And Installing The Swing Frame
— Removing The Swing Frame Bushing
— Installing The Swing Frame Bushing
– BOOM
— Removing And Installing The Boom
– ARTICULATED BOOM
— Removing And Installing The Articulated Boom
– ARM
— Removing And Installing The Arm
— Removing And Installing The Arm To Boom Bushing
— Removing And Installing The Arm To Bucket And Bucket Link Bushing
– BUCKET
— Replacing Bucket Teeth (Heavy Duty Bucket)
— Replacing Bucket Teeth (Severe Duty Bucket)
– CLAMP
— Removing And Installing The Clamp
– TAILGATE
— Removing And Installing The Tailgate
— Removing And Installing The Tailgate Latch
– QUICK COUPLER (PIN GRABBER) (EARLIER MODEL)
— Troubleshooting The Quick Coupler (Pin Grabber)
— Daily Inspection Of The Quick Coupler (Pin Grabber)
— Removing And Installing The Quick Coupler (Pin Grabber)
— Quick Coupler (Pin Grabber) Parts Identification
— Disassembling And Assembling The Quick Coupler (Pin Grabber)
– QUICK COUPLER (PIN GRABBER) (LATER MODEL)
— Troubleshooting The Quick Coupler (Pin Grabber)
— Daily Inspection Of The Quick Coupler (Pin Grabber)
— Removing And Installing The Quick Coupler (Pin Grabber)
— Quick Coupler (Pin Grabber) Parts Identification
— Disassembling And Assembling The Quick Coupler (Pin Grabber)
– QUICK COUPLER (KLAC™ SYSTEM)
— Troubleshooting The Quick Coupler (KLAC™ System)
— Daily Inspection Of The Quick Coupler (KLAC™ System)
— Removing And Installing The Quick Coupler (KLAC™ System)
— Quick Coupler (KLAC™ System) Parts Identification
— Disassembling The Quick Coupler (KLAC™ System)
— Assembling The Quick Coupler (KLAC™ System)
– QUICK COUPLER (GERMAN SYSTEM)
— Troubleshooting The German System Quick Coupler
— German System Quick Coupler Daily Inspection
— Removing The German System Quick Coupler (MS03 And MS08)
— Installing The German System Quick Coupler (MS03 And MS08)
— German System Quick Coupler Parts Identification (MS03)
— Disassembling And Assembling The German System Quick Coupler (MS03)
— German System Quick Coupler Parts Identification (MS08)
— Disassembling The German System Quick Coupler (MS08)
— Assembling The German System Quick Coupler (MS08)
– QUICK COUPLER (HYDRAULIC GERMAN SYSTEM)
— Hyrdraulic Schematic
— Disassembling The Hydraulic German System Quick Coupler
— Assembling The Hydraulic German System Quick Coupler
– RIGHT SIDE COVER
— Removing And Installing The Right Side Cover
— Removing And Installing The Right Side Cover Latch
– TOOLBOX
— Removing And Installing The Tool Box
– CENTER COVER
— Removing And Installing The Center Cover
– LEFT SIDE COVER
— Removing And Installing The Left Side Grille
— Removing And Installing The Left Side Cover
– FUEL TRANSFER PUMP
— Removing And Installing The Fuel Transfer Pump
– LOUVER
— Removing And Installing The Louver
ELECTRICAL SYSTEM AND ANALYSIS
– ELECTRICAL SCHEMATICS
— S/N B62N11001 & Above
– ELECTRICAL SYSTEM INFORMATION
— Electrical Schematics
— Glossary Of Electrical Symbols
— Connections
— Components
— Senders And Sensors
— Upperstruture Harness Connectors
— Motion Alarm Harness Connectors
— Cab Frame Harness Connectors
— Engine Start Harness Connectors
— ECU Harness Connectors
— Troubleshooting Chart
— Electrical System Description
— Fuse And Relay Identification
– BATTERY
— Battery Maintenance
— Maintaining Battery Charge Level
— Battery Maintainers
— Battery Service During Machine Storage
— Testing The Battery
— Charging The Battery
— Using A Booster Battery (Jump Starting)
— Battery Disconnect Switch
— Removing And Installing The Battery Disconnect Switch
— Removing And Installing The Battery
– ALTERNATOR
— Adjusting Alternator Belt
— Replacing Alternator Belt
— Inspecting The Charging System
— Testing The Alternator Voltage
— Testing The Low Voltage
— Testing The High Voltage
— Removing And Installing The Alternator
— Alternator Parts Identification
– STARTER
— Testing The Starter
— Removing And Installing The Starter
— Starter Parts Identification
– INSTRUMENTS AND CONSOLES
— Left Console
— Right Console
— Deluxe Panel
— Touch Display
— Jog Shuttle (Touch Display)
— Using The Jog Shuttle With Touch Display
– LIGHTS
— Removing And Installing The Cab Lights
— Removing And Installing The Boom Light
— Removing And Installing The Articulated Boom Lights
– MAGNETIC LOCKOUT SENSOR
— Removing And Installing Magnetic Lockout Sensor
– FUEL LEVEL SENDER
— Removing And Installing The Lower Fuel Level Sender
— Removing And Installing The Upper Fuel Level Sender
— Testing The Fuel Level Sender
– ACTIVE WARNINGS (DELUXE PANEL)
— Viewing Service Codes
— Maintenance Notification On Deluxe Panel
– VITALS (DELUXE PANEL)
— Accessing Vital Detail
– ATTACHMENTS (DELUXE PANEL)
— Accessing Attachment Information
– MACHINE SETTINGS (DELUXE PANEL)
— Password Description
— Changing The Owner Password
— Changing The User Passwords
— Disabling And Enabling Password Lockout Feature
— Viewing User Log In Information
— Viewing User Job Statistics
— Viewing Overall Job Statistics
— Setting Auto Idle Time Delay
— Resetting The Job Clock
— Activating Eco Mode
– DISPLAY (DELUXE PANEL)
— Setting Date And Time
— Setting The System Language
— Switching Between English / Metric Units
— Setting The Alarm Clock
– GAUGES (TOUCH DISPLAY)
— Notification Drawer
— Accessing Vital Detail And Machine Performance
– CAMERA (TOUCH DISPLAY)
— Operating Rear View Camera
— Adjusting Rear View Camera Settings
– PHONE (TOUCH DISPLAY)
– AUDIO (TOUCH DISPLAY)
– SERVICE (TOUCH DISPLAY)
— Viewing Service Codes
— Viewing And Adjusting Service Schedule
— Recording A Service
— Removing Service Records
– ATTACHMENTS (TOUCH DISPLAY)
— Accessing Attachment Information
– SETTINGS (TOUCH DISPLAY)
— Setting Date And Time
— Adjusting Display Brightness
— Releasing Hydraulic Pressure In Excavator
— Setting Auxiliary Hydraulics Flow Rate
— Activating Auto Idle
— Password Description
— Changing The Owner And Operator Passwords
— Adding An Operator
— Removing An Operator
— Machine Lockout And Quick Start
— Enabling Machine Lockout and Quick Start
— Setting Auto Lock Time
— Setting System Sleep Time
— Enabling Password Error Lockout
— Accessing Operator Statistics
— Using The Job Clock
— Setting The System Language
— Switching Between English / Metric Units
— Dealer Information
— Software Version
– TOUCH DISPLAY
— Removing And Installing The Touch Display
— Removing And Installing The Controller Display
– INSTRUMENT PANEL
— Removing And Installing The Instrument Panel
– CONTROLLER (GATEWAY AND AUXILIARY)
— Controller Description
— Removing And Installing The Gateway Controller
— Removing And Installing The Auxiliary Controller
– CONTROLLER (PIN GRABBER)
— Removing And Installing The Pin Grabber Controller
– ENGINE CONTROL UNIT (ECU)
— Engine Control Unit (ECU) Description
— Cleaning The Engine Control Unit (ECU)
— Removing And Installing The Engine Control Unit (ECU)
– KEY SWITCH
— Removing And Installing The Key Switch
– WIPER MOTOR
— Removing And Installing The Wiper Motor
– TRAVEL MOTION ALARM
— Travel Motion Alarm Description
— Inspecting The Travel Motion Alarm System
— Maintaining The Travel Motion Alarm Switch
– SERVICE PC (LAPTOP COMPUTER)
— Connecting The Remote Start Tool (Service Tool)
– TRAVEL MOTOR AUTO SHIFT
— Auto-Shift Drive System
— Troubleshooting The Travel Motor Auto-Shift
– AUTO IDLE PRESSURE SENSOR
— Auto Idle Pressure Sensor Description
— Removing And Installing The Auto Idle Pressure Switch
– CAMSHAFT AND CRANKSHAFT POSITION SENSOR
— Removing And Installing The Camshaft And Crankshaft Position Sensor
– BOBCAT MACHINE IQ WIRELESS COMMUNICATION
— Bobcat Machine IQ Wireless Communications Description
— Removing And Installing The LTE/4G Controller
— LTE/4G Operating Status
ENGINE SERVICE
– ENGINE INFORMATION
— Engine Description
— Specifications
— Valve Spring
— Valve
— Valve Timing
— Rocker Arms
— Camshaft
— Cylinder Bore
— Piston Rings
— Pistons
— Connecting Rods
— Oil Pump
— Crankshaft
— Timing Gear
— Thermostat
— Sensor Location
— Metric Torque Values
— Torque Values
— Troubleshooting
— Removing And Installing The Engine
— Testing Compression (Glow Plug Adapter)
— Testing Injector Signal (In-Line)
— Testing Oil Pressure (At Turbocharger Oil Inlet)
– DIESEL PARTICULATE FILTER (DPF) SYSTEM
— DPF Description
— DPF Regeneration Tables
— DPF Regeneration Status Icons
— Removing And Installing The Diesel Particulate Filter (DPF)
— Automatic Regeneration Operation (Touch Displays)
— Forced Regeneration Operation (Touch Displays)
— Forced Parked Regeneration Operation
— Inhibit Mode Operation (Touch Displays)
– AIR FILTER
— Removing And Installing The Air Cleaner Housing
– ENGINE COOLING SYSTEM
— Engine Cooling System Description
— Removing And Installing The Radiator Cooling Package
— Removing And Installing The Fan
— Removing And Installing Water Pump
— Removing And Installing The Thermostat Housing
— Testing The Thermostat
– LUBRICATION SYSTEM
— Lubrication System Description
— Removing And Installing The Oil Pan
— Removing And Installing The Oil Pump
— Oil Pump Relief Valve Description
— Removing And Installing The Oil Pump Relief Valve
— Removing And Installing The Oil Cooler
— Disassembling And Assembling The Oil Filter Head
– FUEL SYSTEM
— Fuel System Description
— Removing And Installing The Fuel Filter Housing
— Removing And Installing The Fuel Filter Sensors
— Removing And Installing The Fuel Lift Pump
— Removing And Installing The Fuel Pre-Filter
— Removing And Installing The Transfer Pump / High Pressure Pump
— Removing And Installing The Fuel Temperature Sensor
— Fuel Recirculation Valve (FRV) Description
— Removing And Installing The Fuel Recirculation Valve (FRV)
— Removing And Installing The Fuel Pressure Relief Valve
— Removing And Installing The Fuel Rail Assembly
— Removing And Installing The Fuel Injector
— Coding The Injectors
– CYLINDER HEAD
— Testing The Glow Plugs
— Removing And Installing The Glow Plug
— Removing And Installing The Cylinder Head
— Disassembling And Assembling The Cylinder Head
— Inspecting The Cylinder Head
— Measuring the Cylinder Head Top Clearance
— Measuring The Valve Step Height
— Measuring The Valve Stem Height
— Measuring The Valve Guide
— Measuring The Valve
— Measuring The Valve Spring
— Disassembling And Assembling The Rocker Arm Shaft
— Inspecting The Rocker Arm Shaft
— Installing The Rocker Arm Assembly
— Inspecting The Push Rod
– CRANKSHAFT AND PISTONS
— Removing And Installing The Piston And Connecting Rod
— Inspecting The Piston And Connecting Rod
— Removing And Installing The Crankshaft
— Inspecting The Cylinder Block
— Inspecting The Crankshaft
— Inspecting The Connecting Rod
— Engine Component Class
– CAMSHAFT
— Removing And Installing The Camshaft
— Removing And Installing The Camshaft Bushing
— Inspecting The Camshaft
– GEAR CASE
— Removing And Installing The Gearcase Cover
— Inspecting The Gear Backlash
— Inspecting The Gear Timing
— Removing And Installing The Idle Gear
— Inspecting The Idle Gear
– TURBOCHARGER
— Turbocharger Description
— Removing And Installing The Turbocharger
— Inspecting The Turbocharger
– FLYWHEEL AND HOUSING
— Removing And Installing The Hydraulic Pump Coupler
— Removing And Installing The Flywheel
— Removing And Installing The Ring Gear
– EXHAUST GAS RECIRCULATION (EGR) SYSTEM
— Exhaust Gas Recirculation (EGR) System Description
— Removing And Installing The Exhaust Gas Recirculation (EGR) Cooler
— Removing And Installing The Exhaust Gas Recirculation (EGR) Valve
– EXHAUST MANIFOLD
— Removing And Installing The Exhaust Manifold
– INTERCOOLER
— Intercooler Description
— Removing And Installing The Intercooler
HEATING, VENTILATION, AND AIR CONDITIONING (HVAC)
– AIR CONDITIONING SYSTEM FLOW
— Air Conditioning System Description
— Air Conditioning System Flow Chart
— Air Conditioning System Components
— Air Conditioning System Safety Equipment
– REGULAR MAINTENANCE
— Cleaning And Maintaining The Recirculation Filter
— Cleaning And Maintaining The Fresh Air Filter
— Adjusting Air Conditioning Belt
— Removing The Air Conditioning Compressor Belt
— Installing The Air Conditioning Compressor Belt
— Cleaning And Maintaining The Condenser
— Air Conditioning Lubrication
— Cleaning And Maintaining The Evaporator / Heater Coil
— Air Conditioning Service Chart
— Air Conditioning Service Chart
– TROUBLESHOOTING
— Blower Motor Does Not Operate
— Blower Motor Operates Normally, But Air Flow Is Insufficient
— Insufficient Cooling Although Air Flow And Compressor Operation Are Normal
— The Compressor Operates Improperly Or Not At All
— Gauge Pressure Related Troubleshooting
— Troubleshooting Tree
— Air Conditioning Temperature / Pressure Chart
— Air Conditioning Temperature / Pressure Chart
— Troubleshooting Poor A/C Performance
— HVAC Repair And Leaks
— HVAC Electrical System
— Engine Coolant Bypassing The Heater Valve
– SYSTEM CHARGING AND RECLAMATION
— Identifying Refrigerant
— Reclamation And Charging With Recovery / Charging Unit
– COMPRESSOR
— Removing And Installing The Compressor
— A/C Compressor Oil
— Removing And Installing The Compressor Oil
– CONDENSER
— Removing And Installing The Condenser
– RECEIVER / DRIER
— Removing And Installing The Receiver / Drier
— Removing And Installing The Pressure Switch
– EVAPORATOR / HEATER UNIT
— Removing And Installing The Evaporator / Heater Unit
– THERMOSTAT
— Thermostat Description
— Removing And Installing The Thermostat
– EXPANSION VALVE
— Removing And Installing The Expansion Valve
– EVAPORATOR COIL
— Removing And Installing The Evaporator Coil
– AUTO EVAPORATOR COIL
— Removing And Installing The Auto Evaporator Coil
– HEATER COIL
— Removing And Installing The Heater Coil
– AUTO HEATER COIL
— Removing And Installing The Auto Heater Coil
– BLOWER FAN
— Removing And Installing The Blower Fan
– AUTO BLOWER FAN
— Removing And Installing The Auto Blower Fan
– HEATER VALVE
— Removing And Installing The Heater Valve
– CONTROL PANEL
— Removing And Installing The Control Panel
– HVAC DUCT
— Removing And Installing The HVAC Duct
– AUTO HVAC
— Auto HVAC Description
— Removing And Installing The ATM
— ATM Diagnostic Codes
— Removing And Installing The Blower Fan Drive Assembly
— Removing And Installing The De-Icing Sensor
— Testing The Inside And After Coil Sensor
SPECIFICATIONS
– MACHINE DIMENSIONS
– RATED LIFT CAPACITY – LONG ARM
– RATED LIFT CAPACITY – LONG ARM AND ADD ON COUNTERWEIGHT
– RATED LIFT CAPACITY – STANDARD ARM
– RATED LIFT CAPACITY – STANDARD ARM AND ADD ON COUNTERWEIGHT
– RATED LIFT CAPACITY – ARTICULATED BOOM
– EXCAVATOR SPECIFICATIONS
— Performance Specifications
— Controls Specifications
— Engine Specifications
— Hydraulic System Specifications
— Hydraulic Cylinders
— Hydraulic Cycle Times
— Electrical System Specifications
— Drive System Specifications
— Slew System Specifications
— Undercarriage Specifications
— Capacities Specifications
— Track Specifications
— Ground Pressure Specifications
— Environmental Specifications
— Temperature Range
– TECHNICAL SERVICE GUIDE SPECIFICATIONS
— Engine Specifications
— Engine Torques
— Cooling System
— Excavator Torques
– TORQUE SPECIFICATION FOR BOLTS
— Torque For General SAE Bolts
— Torque For General Metric Bolts
– HYDRAULIC CONNECTION SPECIFICATIONS
— O-ring Face Seal Connection
— Straight Thread O-ring Fitting
— Tubelines And Hoses
— Tightening The Flare Fitting
— O-ring Flare Fitting
— Port Seal Fitting
— Push To Connect Fittings
– HYDRAULIC FLUID SPECIFICATIONS
— Hydraulic Fluid Specifications
– CONVERSIONS
— Decimal And Millimeter Equivalent Chart
— U.S. To Metric Conversion Chart
– SERVICE TOOLS REQUIRED
— Remote Start Tools
— Hydraulic Tools
— Engine Tools
— Electrical Tools
— General Tools
— HVAC Tools




Reviews
There are no reviews yet.