Hitachi ZX180W-7 Wheeled Excavator WLBN50-EN-00 (Preview)
INTRODUCTION
To The Reader
Additional References
Manual Composition
Page Number
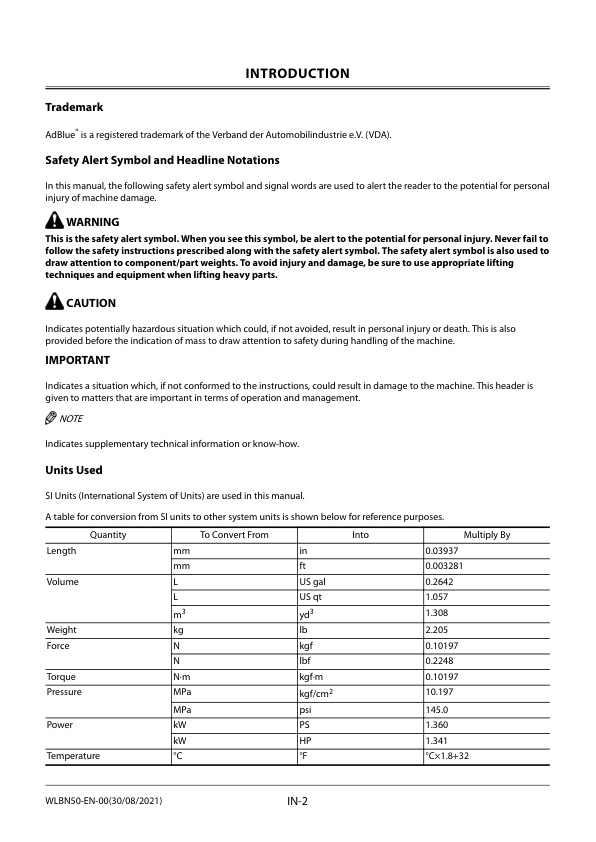
Trademark
Safety Alert Symbol and Headline Notations
Units Used
SYMBOL AND ABBREVIATION
Symbol and Abbreviation
CONTRASTING LIST OF PART NAME
Contrasting List of Part Name between Technical Manual and Parts Catalog
SAFETY
Recognize Safety Information
Understand Signal Words
Follow Safety Instructions
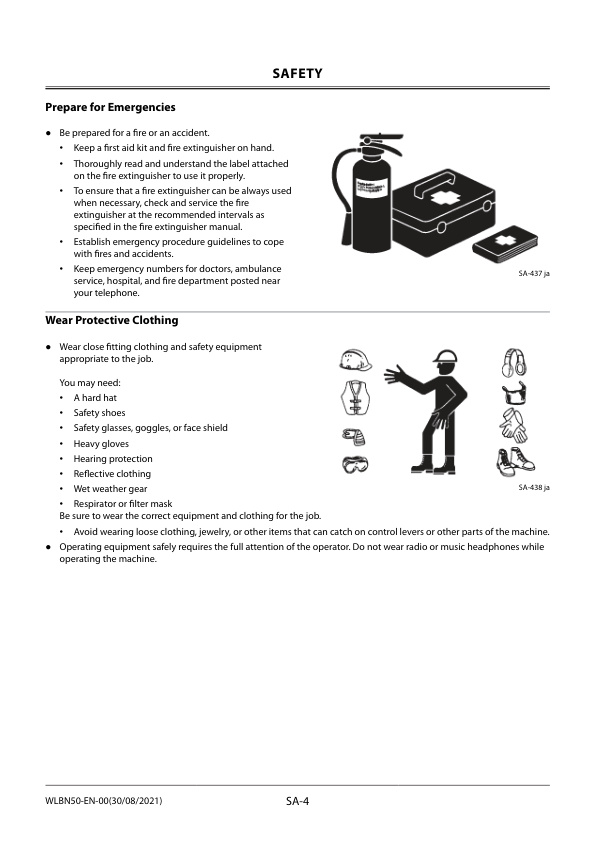
Prepare for Emergencies
Wear Protective Clothing
Protect Against Noise
Inspect Machine
General Precautions for the Cab
Use Handrail and Steps
Adjust the Operator’s Seat
Ensure Safety Before Rising from or Leaving Operator’s Seat
Fasten Your Seat Belt
Move and Operate Machine Safely
Start the Engine Only from Operator’s Seat
Jump Starting
Keep Riders off Machine
Precautions for Operations
Perform Job Site Risk Assessment Beforehand
Install OPG Guard
Restriction of Attachment Installation
Provide Signals for Jobs Involving Multiple Machines
Confirm Direction of Machine to Be Driven
Drive Machine Safely
Avoid Injury from Rollaway Accidents
Avoid Accidents from Reversing and Swing Operation
Keep People Clear from Working Area
Never Position the Bucket Over Anyone
Avoid Undercutting
Avoid Tipping
Never Undercut a High Bank
Dig with Caution
Caution with an Overhead Obstacle
Avoid Power Lines
Precautions for Lightning
Object Handling
Protect Against Flying Debris and Falling Object
Park Machine Safely
Handle Fluids Safely−Avoid Fires
Transport Safely
Practice Maintenance Safely
Warn Others of Service Work
Support Machine Properly
Stay Clear of Moving Parts
Prevent Parts from Flying
Avoid Injury from Attachment Falling Accident
Support Maintenance Properly
Prevent Burns
Replace Rubber Hoses Periodically
Avoid High-Pressure Fluids
Prevent Fires
Check for Oil Leaks:
Check for Short circuits:
Clean up Flammable Materials:
Check Key Switch:
Check Heat Shields:
Evacuating in Case of Fire
Beware of Exhaust Fumes
Precautions for Welding and Grinding
Avoid Heating Near Pressurized Fluid Lines
Avoid Applying Heat to Lines Containing Flammable Fluids
Precautions for Handling Accumulator and Gas Damper
Remove Paint Before Welding or Heating
Beware of Asbestos and Silica Dust and Other Contamination
Prevent Battery Explosions
Service Air Conditioning System Safely
Handle Chemical Products Safely
Dispose of Waste Properly
Never Ride Attachment
Notes on Aftertreatment Device
Precautions for Communication Terminal
Precautions for Communication Terminal Equipment
Operation Stop Alarm (ZX135W-7/150W-7/155W-7/175W-7)
Notes on Protection by Operator’s Station when the Machine Rolls Over
Before Returning the Machine to the Customer
SECTION AND GROUP CONTENTS
CONTENTS
GENERAL
Precautions for Disassembling and Assembling
Precautions for Disassembling and Assembling
Precautions for Using Floating Seal
Precautions for Using Nylon Sling
Maintenance Standard Terminology
Tightening
Tightening Bolts and Nuts
Bolt Types
Specified Tightening Torque Chart
Tightening Order
Precautions for Spilt Flange
Nut and Bolt Locking
Tightening Piping Joint
Union Joint
Pipe Joint
O-Ring Face Seal Joint
Quick Coupling
Screw-In Connection
Seal Tape Application
Low-Pressure-Hose Clamp Tightening
Connecting Hose
Painting
Painting
Bleeding Air
Bleeding Air from Hydraulic System
Bleeding Air from Pump
Bleeding Air from Travel Motor
Bleeding Air from Swing Motor
Bleeding Air from Hydraulic Circuit
Bleeding Air from Fuel System
Air Bleeding from the Diesel Exhaust Fluid Defrosting Piping
Bleeding Air from Transmission
Bleeding Air from Brake (Axle)
Preparation
Preparation before Inspection and Maintenance
Hydraulic Circuit Pressure Release Procedure
Pressure Release from Hydraulic Oil Tank
Pressure Release from Expansion Tank
Pressure Release from Brake Circuit
MAINTENANCE STANDARD
Upperstructure
Maintenance Standard for Pump Device
Maintenance Standard for Swing Motor
Undercarriage
Maintenance Standard for Center Joint
Front Attachment
Maintenance Standard for Pin and Bushing
Maintenance Standard for Side Cutter (2015428, 2015429)
Maintenance Standard for Point (963228)
Standard Dimensions for Arm and Bucket Connection
Standard Dimensions for Arm and Boom Connection
UPPERSTRUCTURE
Cab
Removal of Cab Interior Parts
Removal of Cab Exterior Parts
Removal of Wiper
Removal of Cab Body
Removal of Controller Assembly and Parts Around the Monitor
Installation of Controller Assembly and Parts Around the Monitor
Installation of Cab Body
Installation of Wiper
Installation of Cab Exterior Parts
Installation of Cab Interior Parts
Dimensions of Cab Glass
Procedure to Remove Cab Glass
Procedure to Install Cab Glass
Procedures to Install Upper Door Glass
Procedures to Install Upper Front Glass
Counterweight
Removal of Counterweight
Installation of Counterweight
Main Frame
Removal of Main Frame
Installation of Main Frame
Engine
Preparation before Removal of Engine
Removal of Covers and Related Parts Around the Engine
Removal of Wire Harnesses and Hoses Around the Engine
Removal of Engine Body
Installation of Engine Body
Installation of Wire Harnesses and Hoses Around the Engine
Installation of Related Parts of the Engine
Work after Installation of Engine and Installation of Covers
Radiator Assembly
Removal of Radiator
Installation of Radiator
Removal of Intercooler
Installation of Intercooler
Removal of Oil Cooler
Installation of Oil Cooler
Hydraulic Oil Tank
Removal of Hydraulic Oil Tank
Installation of Hydraulic Oil Tank
Fuel Tank
Removal of Fuel Tank
Installation of Fuel Tank
Pump Device
Removal of Pump Device
Installation of Pump Device
Removal of Coupling
Installation of Coupling
Disassembly of Pump Device
Assembly of Pump Device
Disassembly of Regulator
Assembly of Regulator
Disassembly of Solenoid Valve
Assembly of Solenoid Valve
Removal and Installation of Pilot Pump
Structure of Pilot Pump
Structure of Steering Pump and Assist Pump
Control Valve
Removal of Control Valve
Installation of Control Valve
Structure of Control Valve
Disassembly of Housing A Upper Side
Assembly of Housing A Upper Side
Disassembly of Housing B Upper Side (1)
Assembly of Housing B Upper Side (1)
Disassembly of Housing B Upper Side (2)
Assembly of Housing B Upper Side (2)
Disassembly of Housings A and B Lower Side
Assembly of Housings A and B Lower Side
Disassembly of Housing Right Side
Assembly of Housing Right Side
Disassembly of Housing Left Side
Assembly of Housing Left Side
Disassembly and Assembly of Spool
Disassembly and Assembly of Make-Up Valve
Disassembly and Assembly of Relief Valve
Disassembly and Assembly of Housing
Swing Device
Removal of Swing Device
Installation of Swing Device
Disassembly of Swing Reduction Gear
Assembly of Swing Reduction Gear
Disassembly of Swing Motor
Assembly of Swing Motor
Pilot Valve
Removal of Pilot Valve (Left)
Installation of Pilot Valve (Left)
Removal of Pilot Valve (Right)
Installation of Pilot Valve (Right)
Disassembly of Pilot Valves (Left and Right)
Assembly of Pilot Valves (Left and Right)
Removal of Travel Pilot Valve
Installation of Travel Pilot Valve
Disassembly of Travel Pilot Valve
Assembly of Travel Pilot Valve
Solenoid Valve
Removal of Pilot Shut-Off Solenoid Valve
Installation of Pilot Shut-Off Solenoid Valve
Disassembly of Pilot Shut-Off Solenoid Valve
Assembly of Pilot Shut-Off Solenoid Valve
Removal of Axle Lock/Brake Solenoid Valve Unit
Installation of Axle Lock/Brake Solenoid Valve Unit
Structure of Axle Lock/Brake Solenoid Valve Unit
Removal of Pump 1/Pump 2 Flow Rate Control Solenoid Valve Unit
Installation of Pump 1/Pump 2 Flow Rate Control Solenoid Valve Unit
Structure of Pump 1/Pump 2 Flow Rate Control Solenoid Valve Unit
Removal of 7-Spool Solenoid Valve Unit and 2-Spool Solenoid Valve Unit (For Assist) (Option)
Installation of 7-Spool Solenoid Valve Unit and 2-Spool Solenoid Valve Unit (For Assist) (Option)
Structure of 7-Spool Solenoid Valve Unit
Structure of 2-Spool Solenoid Valve Unit (For Assist) (Option)
Removal of 3-Spool Solenoid Valve Unit 1
Installation of 3-Spool Solenoid Valve Unit 1
Structure of 3-Spool Solenoid Valve Unit 1
Removal of 3-Spool Solenoid Valve Unit 2
Installation of 3-Spool Solenoid Valve Unit 2
Structure of 3-Spool Solenoid Valve Unit 2
Removal of Cruise Control Solenoid Valve
Installation of Cruise Control Solenoid Valve
Structure of Cruise Control Solenoid Valve Unit
Removal of Cruise Stop Solenoid Valve
Installation of Cruise Stop Solenoid Valve
Structure of Cruise Stop Solenoid Valve
Signal Control Valve
Removal of Signal Control Valve
Installation of Signal Control Valve
Structure of Signal Control Valve
Aftertreatment Device
Removal of Aftertreatment Device
Installation of Aftertreatment Device
DEF Tank
Removal of DEF Tank
Installation of DEF Tank
Removal of DEF Tank Suction Filter
Installation of DEF Tank Suction Filter
Removal of DEF Tank Water Supply Inlet Filter
Installation of DEF Tank Water Supply Inlet Filter
Assembly of DEF Tank Water Supply Inlet Filter
Coolant Control Valve
Removal of Coolant Control Valve
Installation of Coolant Control Valve
DEF Supply Module
Removal of DEF Supply Module
Installation of DEF Supply Module
Shockless Valve
Removal of Swing Shockless Valve
Installation of Swing Shockless Valve
Structure of Swing Shockless Valve
Removal of Travel Shockless Valve
Installation of Travel Shockless Valve
Structure of Travel Shockless Valve
Electric Lever
Removal of Auxiliary/Positioning Pedal (Electric Lever)
Installation of Auxiliary/Positioning Pedal (Electric Lever)
Disassembly of Auxiliary/Positioning Pedal (Electric Lever)
Assembly of Auxiliary/Positioning Pedal (Electric Lever)
Removal of Blade/Outrigger Lever (Electric Lever)
Installation of Blade/Outrigger Lever (Electric Lever)
Steering Valve
Removal of Steering Valve
Installation of Steering Valve
Disassembly of Steering Valve
Assembly of Steering Valve
Brake Valve
Removal of Brake Valve
Installation of Brake Valve
Disassembly of Brake Valve
Assembly of Brake Valve
Accumulator Charge Valve
Removal of Accumulator Charging Valve
Installation of Accumulator Charging Valve
Structure of Accumulator Charging Valve
Accumulator Manifold
Removal of Accumulator Manifold
Installation of Accumulator Manifold
Structure of Accumulator Manifold
Lights
Removal of Headlight/Clearance Light/Turn Signal Light (Left)
Installation of Headlight/Clearance Light/Turn Signal Light (Left)
Removal of Headlight/Clearance Light/Turn Signal Light (Right)
Installation of Headlight/Clearance Light/Turn Signal Light (Right)
Removal of Tail Light/Brake Light/Turn Signal Light/Reverse Light
Installation of Tail Light/Brake Light/Turn Signal Light/Reverse Light
Removal of License Plate Light
Installation of License Plate Light
UNDERCARRIAGE
Swing Bearing
Removal of Swing Bearing
Installation of Swing Bearing
Disassembly of Swing Bearing
Assembly of Swing Bearing
Travel Motor
Removal of Travel Motor
Installation of Travel Motor
Disassembly of Travel Motor
Assembly of Travel Motor
Disassembly of Travel Brake Valve
Assembly of Travel Brake Valve
Center Joint
Removal of Center Joint
Installation of Center Joint
Disassembly of Center Joint
Assembly of Center Joint
Transmission
Removal and Installation of Transmission
Disassembly of Transmission
Assembly of Transmission
Axle
Removal of Front Axle
Installation of Front Axle
Disassembly of Front Axle
Assembly of Front Axle
Removal of Rear Axle and Transmission
Installation of Rear Axle and Transmission
Disassembly of Rear Axle
Assembly of Rear Axle
Disassembly of Differential
Assembly of Differential
Disassembly of Steering Cylinder
Assembly of Steering Cylinder
Removal of Tie Rod
Installation of Tie Rod
Adjustment of Steering
Axle Lock Cylinder
Removal of Axle Lock Cylinder
Installation of Axle Lock Cylinder
Disassembly of Axle Lock Cylinder
Assembly of Axle Lock Cylinder
Operate Check Valve
Removal of Operate Check Valve (For Axle Lock Cylinder)
Installation of Operate Check Valve (For Axle Lock Cylinder)
Structure of Operate Check Valve (For Axle Lock Cylinder)
Removal of Operate Check Valve (For Blade Cylinder)
Installation of Operate Check Valve (For Blade Cylinder)
Removal of Operate Check Valve (For Outrigger Cylinder)
Installation of Operate Check Valve (For Outrigger Cylinder)
Structure of Operate Check Valve (For Blade/Outrigger Cylinder)
Solenoid Valve
Removal of 2-Spool Solenoid Valve Unit (For Blade/Outrigger Cylinder)
Installation of 2-Spool Solenoid Valve Unit (For Blade/Outrigger Cylinder)
Structure of 2-Spool Solenoid Valve Unit (For Blade/Outrigger Cylinder)
Removal of Transmission Control Solenoid Valve
Installation of Transmission Control Solenoid Valve
Propeller Shaft
Removal of Propeller Shaft
Installation of Propeller Shaft
Cylinder
Removal of Blade Cylinder
Installation of Blade Cylinder
Disassembly of Blade Cylinder
Assembly of Blade Cylinder
Removal of Outrigger Cylinder
Installation of Outrigger Cylinder
Disassembly of Outrigger Cylinder
Assembly of Outrigger Cylinder
Tire
Removal of Tire
Installation of Tire
Disassembly of Tire Assembly
Assembly of Tire Assembly
FRONT ATTACHMENT
Front Attachment
Removal of Front Attachment (Mono Boom)
Installation of Front Attachment (Mono Boom)
Removal of Front Attachment (2-Piece Boom)
Installation of Front Attachment (2-Piece Boom)
Cylinder
Removal of Boom Cylinder (Mono Boom)
Installation of Boom Cylinder (Mono Boom)
Removal of Boom Cylinder (2-Piece Boom)
Installation of Boom Cylinder (2-Piece Boom)
Disassembly of Boom Cylinder (Mono Boom)
Assembly of Boom Cylinder (Mono Boom)
Disassembly of Boom Cylinder (2-Piece Boom)
Assembly of Boom Cylinder (2-Piece Boom)
Removal of Arm Cylinder (Mono Boom)
Installation of Arm Cylinder (Mono Boom)
Removal of Arm Cylinder (2-Piece Boom)
Installation of Arm Cylinder (2-Piece Boom)
Disassembly of Arm Cylinder
Assembly of Arm Cylinder
Removal of Bucket Cylinder (Mono Boom)
Installation of Bucket Cylinder (Mono Boom)
Removal of Bucket Cylinder (2-Piece Boom)
Installation of Bucket Cylinder (2-Piece Boom)
Disassembly of Bucket Cylinder
Assembly of Bucket Cylinder
Removal of Positioning Cylinder
Installation of Positioning Cylinder
Disassembly of Positioning Cylinder
Assembly of Positioning Cylinder
Hose Rupture Valve
Removal of Hose Rupture Valve for Boom Cylinder (Mono Boom)
Installation of Hose Rupture Valve for Boom Cylinder (Mono Boom)
Removal of Hose Rupture Valve for Boom Cylinder (2-Piece Boom)
Installation of Hose Rupture Valve for Boom Cylinder (2-Piece Boom)
Structure of Hose Rupture Valve for Boom Cylinder (Right)
Structure of Hose Rupture Valve for Boom Cylinder (Left)
Removal of Hose Rupture Valve for Arm Cylinder (Mono Boom)
Installation of Hose Rupture Valve for Arm Cylinder (Mono Boom)
Removal of Hose Rupture Valve for Arm Cylinder (2-Piece Boom)
Installation of Hose Rupture Valve for Arm Cylinder (2-Piece Boom)
Structure of Hose Rupture Valve for Arm Cylinder
Removal of Hose Rupture Valve for Positioning Cylinder
Installation of Hose Rupture Valve for Positioning Cylinder
Structure of Hose Rupture Valve for Positioning Cylinder
SERVICE MANUAL REVISION REQUEST FORM

Reviews
There are no reviews yet.